Work in progress...
Content will be coming soon (work in progress)
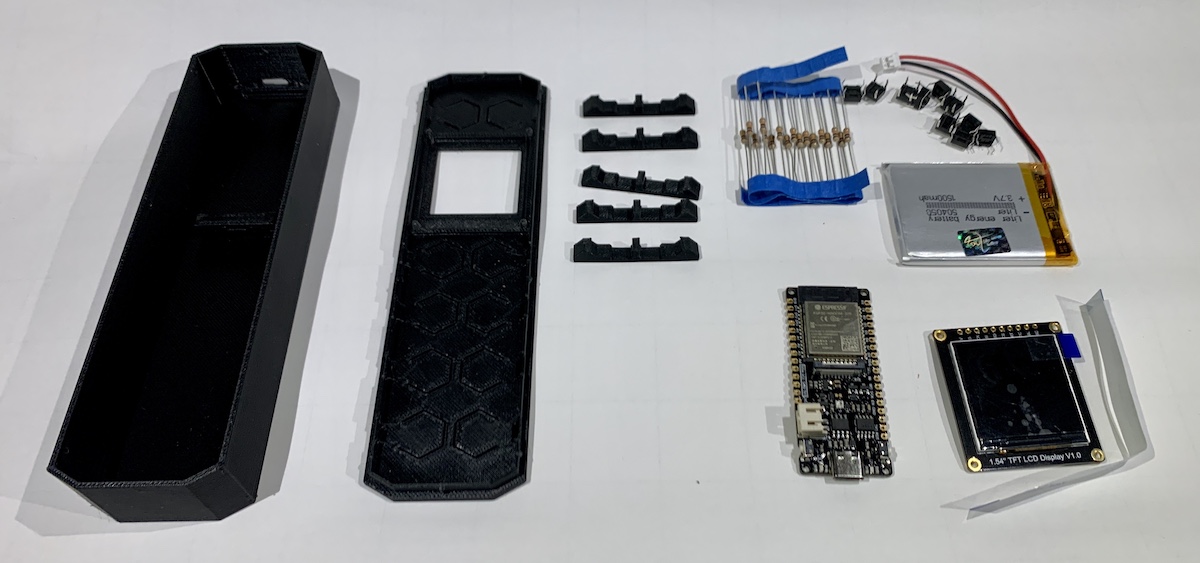
What you need to build your Klipper Remote
Creating your Klipper Remote means 3d printing some parts, sourcing some electronics, putting everything together and configuring, compiling and uploading to the microcontroller.

Parts to print
- 1x KR_Top.stl
- 1x KR_Bottom.stl
- 5x KR_ButtonHolder.stl
Parts to buy
- DFRobot Firebeetle ESP32-E
- DFRobot TFT display 240x240px (comes with a display cable)
- 10x push buttons 4.3mm height 6x6mm
- 2x 10kΩ resistors
- Battery (optional but recommended)
Other tools and parts you need
- Soldering iron
- basic tools for assembly
- A computer running Android Studio (other options like VSC with PlatformIO are available as well) to configure, compile and upload the code
- Superglue
- Sanding paper
- 2m wire ~AWG 24 (black)
- Small zip tie (black)
- Isolating tape (black)
The reason why I recommend black supplies is that there are small grooves in the top of the remote, where the buttons are. Black internals won't be as visible as bright colors.